Secrets of Apherumes Quest: Difference between revisions
No edit summary |
No edit summary |
||
| (One intermediate revision by the same user not shown) | |||
| Line 49: | Line 49: | ||
== Requirements == | == Requirements == | ||
* Minimum level of 200. | * Minimum level of 200. | ||
* Treasure | * [[Treasure Map]] (dropped by pirates) | ||
* Shovel | * [[Shovel]] | ||
* [[Durable Torch]] | |||
* [[Mummified Skull]] | |||
* [[Relic Skull]] | |||
=== Preparation === | === Preparation === | ||
| Line 63: | Line 66: | ||
Here you will need a treasure map and a shovel to gain access down. | Here you will need a treasure map and a shovel to gain access down. | ||
<br> | <br> | ||
Treasure Map is looted from pirates in mountains to the north, [https://grimhaven.net/map_viewer/#zoom,14,position,31019,30457,7 here]. | [[Treasure Map]] is looted from pirates in mountains to the north, [https://grimhaven.net/map_viewer/#zoom,14,position,31019,30457,7 here]. | ||
<br> | <br> | ||
[[File:secretesofapherumes1.png|500px]] | [[File:secretesofapherumes1.png|500px]] | ||
| Line 71: | Line 74: | ||
'''When starting the quest you will spawn in a room with a barrel that has a fuse on it.''' | '''When starting the quest you will spawn in a room with a barrel that has a fuse on it.''' | ||
<br> | <br> | ||
'''You will need to find | '''You will need to find a [[Durable Torch]] to ingnite the barrel and blow up the wall.''' | ||
<br> | <br> | ||
'''To get to the | '''To get to the [[Durable Torch]] you will have to find a sarcophagus that contains a [[Relic Skull]],''' | ||
<br> | <br> | ||
'''that is used for sacrifice to gain access to the hidden tomb where the | '''that is used for sacrifice to gain access to the hidden tomb where the [[Durable Torch]] is located.''' | ||
<br><br> | <br><br> | ||
The | The [[Relic Skull]] is located to the north east in a sarcophagus, [https://grimhaven.net/map_viewer/#zoom,17,position,30877,30535,13 here]. | ||
<br> | <br> | ||
[[File:soa_bloodskull.png|500px]] | [[File:soa_bloodskull.png|500px]] | ||
| Line 87: | Line 90: | ||
[[File:soa_bloodskull_sacrifice.png|500px]] | [[File:soa_bloodskull_sacrifice.png|500px]] | ||
<br><br> | <br><br> | ||
Loot this chest to obtain | Loot this chest to obtain [[Durable Torch]], [https://grimhaven.net/map_viewer/#zoom,17,position,30846,30524,12 here]. | ||
<br> | <br> | ||
[[File:soa_eternalflames.png|500px]] | [[File:soa_eternalflames.png|500px]] | ||
<br><br> | <br><br> | ||
Use the | Use the [[Durable Torch]] on the barrel with a red x on it to light it, [https://grimhaven.net/map_viewer/#zoom,17,position,30828,30591,13 here]. | ||
<br> | <br> | ||
[[File:soa_eternalflamesonbarrel.png|500px]] | [[File:soa_eternalflamesonbarrel.png|500px]] | ||
| Line 109: | Line 112: | ||
[[File:soa_apherumeswife.png|500px]] | [[File:soa_apherumeswife.png|500px]] | ||
<br><br> | <br><br> | ||
'''On this next floor you must obtain a | '''On this next floor you must obtain a [[Mummified Skull]] that is used as a sacrifice.'''<br> | ||
'''But before sacrificing it, you need to pull two levers.'''<br> | '''But before sacrificing it, you need to pull two levers.'''<br> | ||
'''One to remove a gate and the other to create a bridge.'''<br> | '''One to remove a gate and the other to create a bridge.'''<br> | ||
<br> | <br> | ||
Head south west and locate the | Head south west and locate the sarcophagus containing the [[Mummified Skull]], [https://grimhaven.net/map_viewer/#zoom,17,position,30840,30575,12 here]. | ||
<br> | <br> | ||
[[File:soa_blackskull.png|500px]] | [[File:soa_blackskull.png|500px]] | ||
| Line 129: | Line 132: | ||
[[File:soa_blackskulllever2bridge.png|500px]] | [[File:soa_blackskulllever2bridge.png|500px]] | ||
<br><br> | <br><br> | ||
Now go back and sacrifice the | Now go back and sacrifice the [[Mummified Skull]] [https://grimhaven.net/map_viewer/#zoom,17,position,30916,30548,12 here] and head over the bridge. | ||
<br> | <br> | ||
Once past the bridge you will be granted the second and last checkpoint. | Once past the bridge you will be granted the second and last checkpoint. | ||
| Line 145: | Line 148: | ||
[[File:soa_finalfloorlever1.png|500px]] | [[File:soa_finalfloorlever1.png|500px]] | ||
<br><br> | <br><br> | ||
Second lever located [https://grimhaven.net/map_viewer/#zoom,16,position, | Second lever located [https://grimhaven.net/map_viewer/#zoom,16,position,30910,30586,14 here]. | ||
<br> | <br> | ||
[[File:soa_finalfloorlever2.png|500px]] | [[File:soa_finalfloorlever2.png|500px]] | ||
Latest revision as of 20:43, 30 November 2024
Legends[edit]
Once upon a time, in a land filled with vast deserts and ancient mysteries, there was a legendary king known as Apherumes. He was a wise and noble ruler who brought unity and peace to the people of the desert lands. Under his reign, the people lived in harmony and prosperity, free from the devastation of war and bloodshed.
However, all good things must come to an end, and when King Apherumes passed away, his kingdom fell into chaos. Evil creatures and pirates of the desert seized the opportunity to seize power, plunging the once thriving land into darkness and despair. Despite the passage of time, the memory of King Apherumes still lingers in the hearts of the people, and they continue to pay tribute to him at his memorial structure.
The memorial structure is a small pyramid located in the north-western part of the desert, shrouded in mystery and surrounded by whispers of the tunnels that lie hidden beneath its ancient stones. Some say that these tunnels stretch for miles, holding untold secrets and treasures waiting to be discovered by brave adventurers.
Location[edit]
Beneath the small pyramid in the Desert, here
Dangers[edit]
On the way to the Quest you will face monsters such as Betrayed Wraiths, Lost Souls, Hand Of Cursed Fate, Grim Reapers, Spectres and Blightwalkers. The quest only involves Mad Ghosts, Blind Ghouls, Old Mummys, Apherumes Wife and Apherumes.
Rewards[edit]
One out of four available items:
One out of three available mounts:
And:
- 4,000,000 Experience Points
- Eye of Apherumes (deco item)
- Red Pouch (Vol:25)
- 200 Magical Dusts
- 100 Grimhaven Tokens
- 100 Crystal Coins
- Pharaoh Outfit
Overview[edit]
The Secrets of Apherumes Quest is a high-level quest in Tibia, designed for a big team of players, each at least level 200. The quest is notorious for its difficulty and is considered a rite of passage for top-level players seeking to earn exclusive rewards.
Requirements[edit]
- Minimum level of 200.
- Treasure Map (dropped by pirates)
- Shovel
- Durable Torch
- Mummified Skull
- Relic Skull
Preparation[edit]
Prepare by bringing alot of supplies and a good team. High-level healing runes and potions are essential.
Walkthrough[edit]
Getting There[edit]
Start by travelling to the Desert.
Then travel to the small pyramid north west in the Desert, located here.
Here you will need a treasure map and a shovel to gain access down.
Treasure Map is looted from pirates in mountains to the north, here.

Go west and then down 2 floors to find the entrance room to the quest, here.
When starting the quest you will spawn in a room with a barrel that has a fuse on it.
You will need to find a Durable Torch to ingnite the barrel and blow up the wall.
To get to the Durable Torch you will have to find a sarcophagus that contains a Relic Skull,
that is used for sacrifice to gain access to the hidden tomb where the Durable Torch is located.
The Relic Skull is located to the north east in a sarcophagus, here.
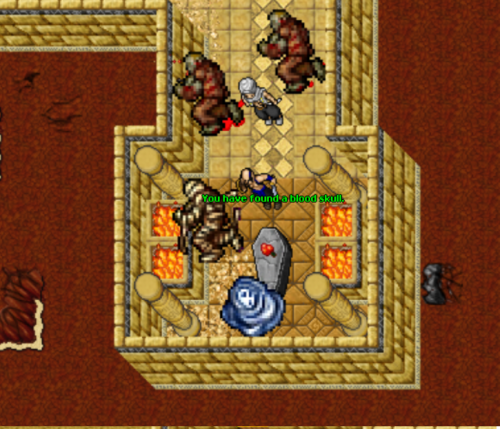
The sacrifice table is located to the north west close to the starting room, here.
Place the skull on the table and walk in the blue fire to get teleported to the other side.
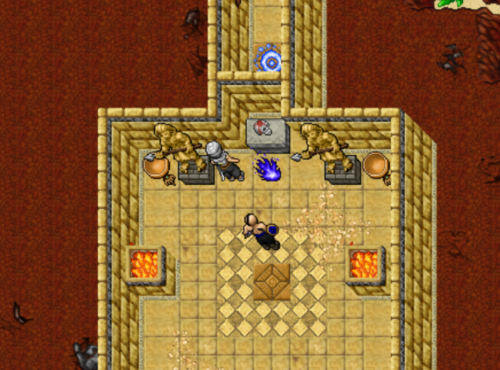
Loot this chest to obtain Durable Torch, here.

Use the Durable Torch on the barrel with a red x on it to light it, here.

Now you have to pull a lever to remove a wall, the lever is located in a big room, here.
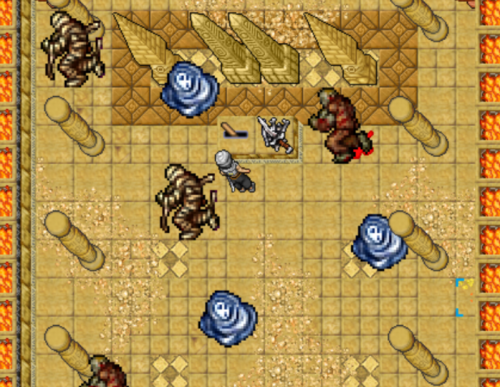
Pulling the lever will remove this wall here, walking past it will grant you the first checkpoint.

Entering this teleport will lead you to a BOSS room.
Apherumes Wife will spawn with 7 other monsters, when the boss and all monsters are defeated the bars will be removed and you can leave.
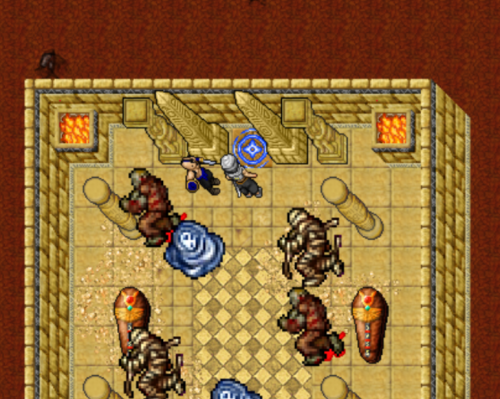
On this next floor you must obtain a Mummified Skull that is used as a sacrifice.
But before sacrificing it, you need to pull two levers.
One to remove a gate and the other to create a bridge.
Head south west and locate the sarcophagus containing the Mummified Skull, here.

Now head to the east and find a small narrow path leading to this lever, here.
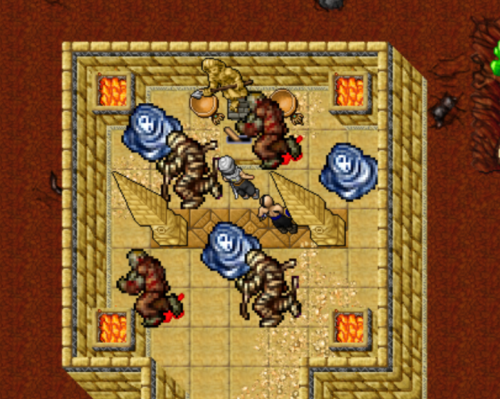
Go back through the narrow path and head south east, and this gate will be removed, here.

Keep following the path and you will find this lever here to create a bridge after the sacrifice has been made.

Now go back and sacrifice the Mummified Skull here and head over the bridge.
Once past the bridge you will be granted the second and last checkpoint.
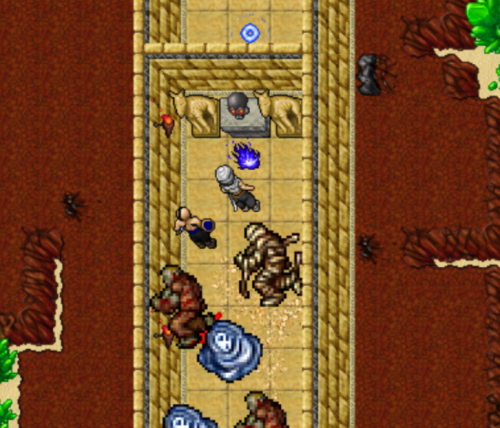
This last floor of the quest contains the final room with the BOSS Apherumes.
To gain access to it you must pull three levers, they are located on the north and west side on this floor.
The final room is located to south west.
First lever located here.

Second lever located here.
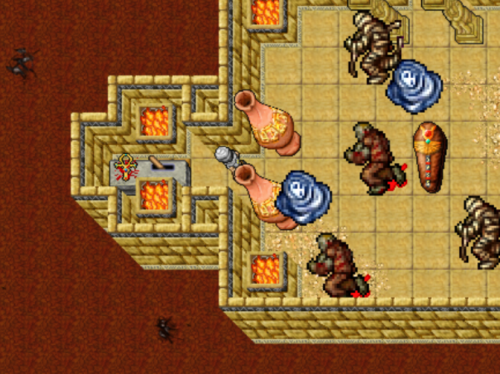
Third lever located here.

When all the levers are pulled these walls will disappear, here.

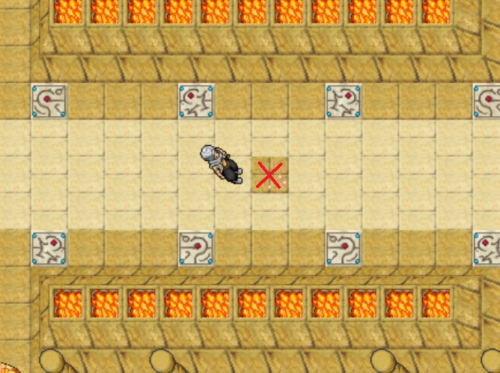
Walking on this tile will spawn the final BOSS Apherumes.
He will spawn with 8 other monsters aswell.
Claiming the Reward[edit]
Once Apherumes is defeated, step into the reward room and claim your reward from the chests.

Strategy Tips[edit]
- Use area spells and runes to maximize damage.
- Coordinate with your team to distribute healing and attacks evenly.
- Be prepared with escape plans in case the battle turns against you.
