Double Hero Quest: Difference between revisions
No edit summary |
No edit summary |
||
| (One intermediate revision by the same user not shown) | |||
| Line 5: | Line 5: | ||
| location = Edron Hero Cave | | location = Edron Hero Cave | ||
| level = 0 | | level = 0 | ||
| dangers = | | dangers = Beholder, Monk, Demon Skeleton, Orc Shaman, Wild Warrior, Hunter, Priestess, Dragon, Hero. | ||
| reward = Rare Gem and Club Ring | | reward = Rare Gem and Club Ring | ||
}} | }} | ||
| Line 16: | Line 16: | ||
== Dangers == | == Dangers == | ||
Be prepared to face creatures such as: [[ | Be prepared to face creatures such as: [[Beholder]], [[Monk]], [[Demon Skeleton]], [[Orc Shaman]], [[Wild Warrior]], [[Hunter]], [[Priestess]], [[Dragon]], [[Hero]]. | ||
== Rewards == | == Rewards == | ||
| Line 32: | Line 32: | ||
=== Getting There === | === Getting There === | ||
Start by traveling to Edron, then make you way to the [[Edron Hero Cave]]. | |||
<br> | <br> | ||
[[File: | On the way there you may face a couple of [[Wolf]], [[Bear]], [[Hunter]], [[Wild Warrior]]. | ||
<br> | |||
[[File:demonhelmetquest1.png|300px]] | |||
| | |||
[[File:demonhelmetwaytoherocave.png|150px]] | |||
<br><br> | |||
'''Then you have to go through numerous underground corridors meeting along the way:''' | |||
<br> | |||
[[Wild Warrior]]s: | |||
<br> | |||
[[File:demonhelmetquest3.jpg|250px]] | |||
<br><br> | |||
[[Demon Skeleton]]s, [[Wild Warrior]]s, [[Priestess]]es, [[Ghoul]]s and [[Beholder]]s surrounded by [[Skeleton]]s: | |||
<br> | |||
[[File:demonhelmetquest4.jpg|250px]] | |||
<br><br> | |||
[[Monk]]s, [[Demon Skeleton]]s, [[Wild Warrior]]s: | |||
<br> | |||
[[File:demonhelmetquest5.jpg|250px]] | |||
<br><br> | |||
[[Dragon]]s: | |||
<br> | |||
[[File:demonhelmetquest6.jpg|250px]] | |||
<br><br> | |||
[[Monk]]s, [[Hero]], [[Demon Skeleton]], and [[Beholder]]s: | |||
<br> | |||
[[File:DhQ2.png|250px]] | |||
<br><br> | |||
[[Wild Warrior]]s, [[Monk]]s, [[Priestess]]es, [[Orc Shaman]], [[Demon Skeleton]], 2 [[Hero]]: | |||
<br> | |||
[[File:DhQ3.png|150px]] | |||
<br><br> | <br><br> | ||
=== Claiming the Reward === | === Claiming the Reward === | ||
After killing the enemies go to the south wall and take the rewards from the crate | |||
<br> | |||
[[File:dhq11.png|500px]] | [[File:dhq11.png|500px]] | ||
<br> | <br> | ||
Latest revision as of 20:46, 28 April 2024
Legends[edit]
Two heroes are guarding a precious treasure deep inside the Edron Hero Cave.
Location[edit]
Dangers[edit]
Be prepared to face creatures such as: Beholder, Monk, Demon Skeleton, Orc Shaman, Wild Warrior, Hunter, Priestess, Dragon, Hero.
Rewards[edit]
Requirements[edit]
Walkthrough[edit]
Getting There[edit]
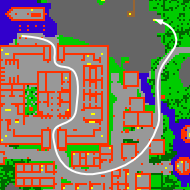
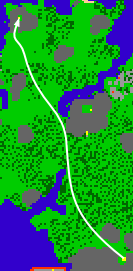
Start by traveling to Edron, then make you way to the Edron Hero Cave.
On the way there you may face a couple of Wolf, Bear, Hunter, Wild Warrior.
 |
|
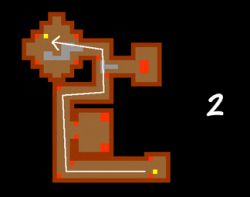
Then you have to go through numerous underground corridors meeting along the way:
Wild Warriors:

Demon Skeletons, Wild Warriors, Priestesses, Ghouls and Beholders surrounded by Skeletons:
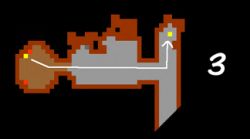
Monks, Demon Skeletons, Wild Warriors:
Dragons:
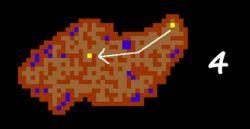
Monks, Hero, Demon Skeleton, and Beholders:
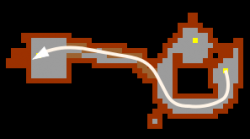
Wild Warriors, Monks, Priestesses, Orc Shaman, Demon Skeleton, 2 Hero:

Claiming the Reward[edit]
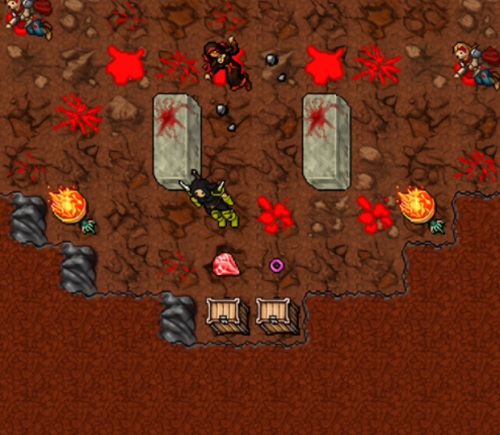
After killing the enemies go to the south wall and take the rewards from the crate
Strategy Tips[edit]
- Use area spells and runes to maximize damage.
- Coordinate with your team to distribute healing and attacks evenly.
- Be prepared with escape plans in case the battle turns against you.
