My Destiny Quest: Difference between revisions
No edit summary |
No edit summary |
||
| Line 55: | Line 55: | ||
''' | '''Use the key to gain entrance to the old power plant, door is located [https://grimhaven.net/map_viewer/#zoom,17,position,31471,30583,7 here].''' | ||
<br> | <br> | ||
[[File:MDQ2.png|500px]] | [[File:MDQ2.png|500px]] | ||
| Line 61: | Line 61: | ||
''' | '''Inisde the giant building in the middle you will find a level door.''' | ||
<br> | |||
'''Use the machine three times to break it, when it breaks four [[Massive Energy Elemental|Massive Energy Elementals]] will spawn.''' | |||
<br> | <br> | ||
[[File:MDQ3.png|500px]] | [[File:MDQ3.png|500px]] | ||
| Line 67: | Line 69: | ||
''' | '''Keep heading up until you reach the top floor, there you will find a lever, located [https://grimhaven.net/map_viewer/#zoom,17,position,31497,30583,5 here].''' | ||
<br> | |||
'''When you pull the third lever four [[War Golem|War Golems]] will spawn.''' | |||
<br> | <br> | ||
[[File:MDQ4.png|500px]] | [[File:MDQ4.png|500px]] | ||
| Line 73: | Line 77: | ||
''' | '''After pulling the three levers all the screws blocking the stairs will be removed.''' | ||
<br> | <br> | ||
[[File:MDQ5.png|500px]] | [[File:MDQ5.png|500px]] | ||
| Line 79: | Line 83: | ||
''' | '''Keep heading down to the east until you find another machine, located [https://grimhaven.net/map_viewer/#zoom,17,position,31531,30586,10 here].''' | ||
<br> | |||
'''Use it three times to break it.''' | |||
<br> | |||
'''When it breaks six [[Massive Energy Elemental|Massive Energy Elementals]] will spawn.''' | |||
<br> | <br> | ||
[[File:MDQ6.png|500px]] | [[File:MDQ6.png|500px]] | ||
| Line 85: | Line 93: | ||
''' | '''Now head west then south until you reach the lab quarters.''' | ||
<br> | |||
'''Pick up the [[Brain]] on the counter, located [https://grimhaven.net/map_viewer/#zoom,17,position,31494,30611,10 here].''' | |||
<br> | <br> | ||
[[File:MDQ7.png|500px]] | [[File:MDQ7.png|500px]] | ||
| Line 91: | Line 101: | ||
''' | '''After that you will have access through the quest door to the east, located [https://grimhaven.net/map_viewer/#zoom,17,position,31533,30602,10 here].''' | ||
<br> | |||
'''Here you will find a dead end with locked doors, you will have to turn up the gas in the pipes to cause an explosion.''' | |||
<br> | <br> | ||
[[File:MDQ8.png|500px]] | [[File:MDQ8.png|500px]] | ||
| Line 97: | Line 109: | ||
''' | '''In the big room up ahead you will find another larger machine, hit it three times to break it.''' | ||
<br> | |||
'''Once it breaks nine [[Massive Energy Elemental|Massive Energy Elementals]], will spawn.''' | |||
<br> | <br> | ||
[[File:MDQ9.png|500px]] | [[File:MDQ9.png|500px]] | ||
| Line 103: | Line 117: | ||
''' | '''Now the energy blocking the path behind the other side of the wall will be removed, [https://grimhaven.net/map_viewer/#zoom,17,position,31554,30578,10 here].''' | ||
<br> | <br> | ||
'''Walk down the stairs and you will find the boss room.''' | |||
<br> | |||
[[File:MDQ10.png|500px]] | [[File:MDQ10.png|500px]] | ||
<br><br> | <br><br> | ||
''' | '''Here is were you need to use the [[Brain]] and put it inside the machine for the boss to spawn.''' | ||
<br> | |||
'''Doing it will spawn the boss [[Cerebral Mechanix]].''' | |||
<br> | |||
'''When the boss spawns you will be trapped inside the room.''' | |||
<br> | <br> | ||
[[File:MDQ11.png|500px]] | [[File:MDQ11.png|500px]] | ||
| Line 115: | Line 136: | ||
''' | '''After killing the boss you will have access through this quest door, [https://grimhaven.net/map_viewer/#zoom,17,position,31517,30568,10 here].''' | ||
<br> | |||
'''Inside you will find the [[Elixir of Vitality]].''' | |||
<br> | <br> | ||
[[File:MDQ12.png|500px]] | [[File:MDQ12.png|500px]] | ||
| Line 121: | Line 144: | ||
''' | '''Bring the [[Elixir of Vitality]] to [[Captain Barbossa]] located, [https://grimhaven.net/map_viewer/#zoom,17,position,31333,30747,5 here].''' | ||
<br> | |||
'''You will need the [[Rebirth System|First Rebirth]] to access him.''' | |||
<br> | |||
'''Once you have given him the elixir you will have access to the city of [[Tavros]], just ask him for 'passage' to travel.''' | |||
<br> | <br> | ||
[[File:MDQ13.png|500px]] | [[File:MDQ13.png|500px]] | ||
| Line 127: | Line 154: | ||
''' | '''Now head to the north east inside the city and you will find the castle, located [https://grimhaven.net/map_viewer/#zoom,17,position,32003,30554,6 here].''' | ||
<br> | |||
'''Ask [[Jack the Guard]] for <span style="color:orange;">"passage"</span> or <span style="color:orange;">"mission"</span>, he will deny your request.''' | |||
<br> | |||
'''You will have to find a way to make him let you inside.''' | |||
<br> | <br> | ||
[[File:MDQ14.png|500px]] | [[File:MDQ14.png|500px]] | ||
| Line 133: | Line 164: | ||
''' | '''Find the NPC [[Alda]], located [https://grimhaven.net/map_viewer/#zoom,17,position,31984,30613,6 here], ask her about <span style="color:orange;">"jack"</span> or <span style="color:orange;">"mission"</span>.''' | ||
<br> | |||
'''She will ask for some help before telling you anything.''' | |||
<br> | |||
'''Bring her 10x [[Pig Foot]] and 10x [[Wool]].''' | |||
<br> | |||
'''After that she will tell you find and speak with husband [[Pavel]].''' | |||
<br> | <br> | ||
[[File:MDQ15.png|500px]] | [[File:MDQ15.png|500px]] | ||
| Line 139: | Line 176: | ||
''' | '''He is located by the docks near the ship to the west, [https://grimhaven.net/map_viewer/#zoom,17,position,31886,30614,7 here], ask him about <span style="color:orange;">"jack"</span> or <span style="color:orange;">"mission"</span>.''' | ||
<br> | |||
'''He will ask for some help before telling you anything.''' | |||
<br> | |||
'''You will be given a fishing rod, use it on the shimmering spot in the water then speak with him again.''' | |||
<br> | |||
'''When your done he will tell you to find the beggar [[Branwulf]].''' | |||
<br> | <br> | ||
[[File:MDQ16.png|500px]] | [[File:MDQ16.png|500px]] | ||
| Line 145: | Line 188: | ||
''' | '''He is located by the temple, [https://grimhaven.net/map_viewer/#zoom,17,position,31962,30623,6 here], ask him about <span style="color:orange;">"jack"</span> or <span style="color:orange;">"mission"</span>.''' | ||
<br> | |||
'''He will ask for some gold before telling you anything.''' | |||
<br> | |||
'''Bring him 1x [[Gold Ring]].''' | |||
<br> | |||
'''After that he will tell you he doesn't really know anything but has a place up in the mountains were you might find out something.''' | |||
<br> | <br> | ||
[[File:MDQ17.png|500px]] | [[File:MDQ17.png|500px]] | ||
| Line 151: | Line 200: | ||
''' | '''Head out the north gate of the city and walk up the mountain to the east.''' | ||
<br> | |||
'''There you will find a telescope, located [https://grimhaven.net/map_viewer/#zoom,17,position,31972,30540,1 here].''' | |||
<br> | |||
'''After using it you see something that you can use to blackmail [[Jack the Guard]] to let you inside the castle.''' | |||
<br> | |||
'''Now go back to [[Jack the Guard]] and ask him for <span style="color:orange;">"passage"</span> or <span style="color:orange;">"mission"</span>.''' | |||
<br> | |||
'''You will now have full access to the castle, where you can find [[King Tiberius]].''' | |||
<br> | <br> | ||
[[File:MDQ18.png|500px]] | [[File:MDQ18.png|500px]] | ||
| Line 157: | Line 214: | ||
''' | '''Before the [[King Tiberius]] will let you [[Promotion|promote]] you will need to prove yourself to him.''' | ||
<br> | |||
'''You will need to complete four trials outside of the city of [[Tavros]].''' | |||
<br> | |||
'''They don't need to be done in any specific order.''' | |||
<br> | <br> | ||
[[File:MDQ19.png|500px]] | [[File:MDQ19.png|500px]] | ||
| Line 163: | Line 224: | ||
''' | '''Undead Grave Cave.''' | ||
<br> | |||
'''The entrance is located [https://grimhaven.net/map_viewer/#zoom,16,position,31917,30463,7 here].''' | |||
<br> | |||
'''Inside the cave head to the north east you will find a bone totem, located [https://grimhaven.net/map_viewer/#zoom,16,position,31979,30437,12 here].''' | |||
<br> | |||
'''Using it will trap you and spawn eight [[Gravecaller|Gravecallers]].''' | |||
<br> | |||
'''Once you have killed all creatures this trial is done.''' | |||
<br> | <br> | ||
[[File:MDQ20.png|500px]] | [[File:MDQ20.png|500px]] | ||
| Line 169: | Line 238: | ||
''' | '''Swamp Cave.''' | ||
<br> | |||
'''The entrance is located [https://grimhaven.net/map_viewer/#zoom,16,position,32116,30571,7 here].''' | |||
<br> | |||
'''Inside the cave head to the east until you find this spot [https://grimhaven.net/map_viewer/#zoom,18,position,32283,30556,8 here], use shovel on it and a hole will appear.''' | |||
<br> | |||
'''Down there you will find a Giant Larva Bug that each player needs to feed with [[Bug Meat]] eight times each.''' | |||
<br> | |||
'''The [[Bug Meat]] can be dropped by [[Dreadtick]], [[Gloobslug]] and [[Duskmoth]] inside the cave.''' | |||
<br> | |||
'''Once you have fed the giant larva 8 times the trial is done.''' | |||
<br> | <br> | ||
[[File:MDQ21.png|500px]] | [[File:MDQ21.png|500px]] | ||
<br><br> | <br><br> | ||
''' | '''Forgotten Tombs.''' | ||
<br> | |||
'''The entrance is located [https://grimhaven.net/map_viewer/#zoom,17,position,31899,30784,7 here].''' | |||
<br> | |||
'''Inside the tomb head to big room in the middle on floor -2, [https://grimhaven.net/map_viewer/#zoom,17,position,31902,30863,9 here].''' | |||
<br> | |||
'''Walk down the stairs and enter the room and you will find a coffin, using it will trap you inside and spawn the boss [[Amun Shai]].''' | |||
<br> | <br> | ||
'''Once the boss is killed the trial is done.''' | |||
''' | |||
<br> | <br> | ||
[[File:MDQ22.png|500px]] | [[File:MDQ22.png|500px]] | ||
| Line 187: | Line 268: | ||
''' | '''Volcano.''' | ||
<br> | |||
'''The entrance is located [https://grimhaven.net/map_viewer/#zoom,17,position,32064,30453,6 here].''' | |||
<br> | |||
'''Inside the volcano head north until you find this room with the statue, located [https://grimhaven.net/map_viewer/#zoom,17,position,32065,30447,10 here].''' | |||
<br> | |||
'''Using it will trap you and spawn eight [[Hellscorcher|Hellscorchers]].''' | |||
<br> | |||
'''Once you have killed all creatures this trial is done.''' | |||
<br> | <br> | ||
[[File:MDQ23.png|500px]] | [[File:MDQ23.png|500px]] | ||
<br><br> | <br><br> | ||
=== Claiming the Reward === | |||
'''Once you have completed the four trials go back to the [[King Tiberius]] and ask for a [[Promotion|promotion]].''' | |||
<br> | |||
'''You will need:''' | |||
* 500x [[Tavros Token]] | |||
* [[Gold Coin|10,000,000 gp]] | |||
* Level 200 or higher | |||
<br> | |||
[[File:MDQ19.png|500px]] | |||
<br> | |||
Latest revision as of 15:08, 16 November 2025
| My Destiny Quest | |
|---|---|
 | |
| The beginning of the My Destiny Quest | |
| Location | In the bandit cave east of Rissne, entrance located here |
| Level | 200+ |
| Dangers | Worker Golem, War Golem, Massive Energy Elemental, Cerebral Mechanix, Cryptmage, Soulblight, Skullrot, Dreadtick, Gloobslug, Duskmoth, Luminidrake, Aurabeetle, Fangweaver, Pyrothane, Blazeblob, Embershroom, Hellscorcher, Gravecaller, Amun Shai. |
| Reward | Access to the city Tavros and the Second Promotion |
Legends[edit]
Legends whisper of a city veiled beyond the horizon, where only the worthy may ascend.
There are rumors of a distant city far to the east, known as Tavros, a place said to welcome only the greatest of warriors, those who have proven their strength and courage beyond doubt.
It is ruled by King Tiberius, a sovereign who grants promotion only to the most valiant souls. Many have sought the path to Tavros, yet few have ever found it. Perhaps your destiny lies there, awaiting its call.
Location[edit]
In the bandit cave east of Rissne, entrance located here
Dangers[edit]
The quest involves Worker Golem, War Golem, Massive Energy Elemental, Cerebral Mechanix, Cryptmage, Soulblight, Skullrot, Dreadtick, Gloobslug, Duskmoth, Luminidrake, Aurabeetle, Fangweaver, Pyrothane, Blazeblob, Embershroom, Hellscorcher, Gravecaller, Amun Shai.
Rewards[edit]
- Access to the city Tavros
- Second Promotion
Requirements[edit]
- Copper Key (Key:7276)
- Brain
- Elixir of Vitality
- 10x Pig Foot
- 10x Wool
- 1x Gold Ring
- 8x Bug Meat
- 500x Tavros Token
- 10,000,000 gp.
- First Rebirth
- Level 200 or higher (for the promotion).
Walkthrough[edit]
Getting There[edit]
Start by travelling to Rissne, find the bandit cave east of the city, entrance is located here.
Make your way through the cave until you find these three chests, one of them contains the Copper Key (Key:7276).

Use the key to gain entrance to the old power plant, door is located here.
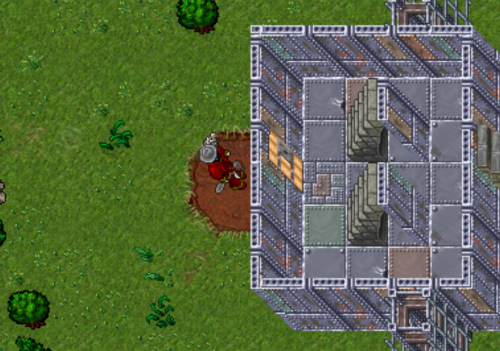
Inisde the giant building in the middle you will find a level door.
Use the machine three times to break it, when it breaks four Massive Energy Elementals will spawn.
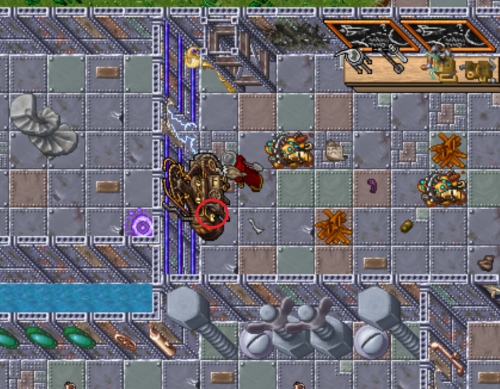
Keep heading up until you reach the top floor, there you will find a lever, located here.
When you pull the third lever four War Golems will spawn.
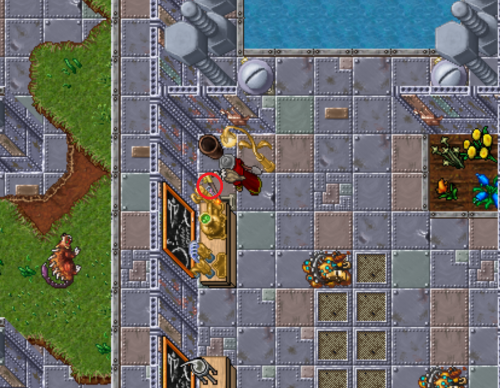
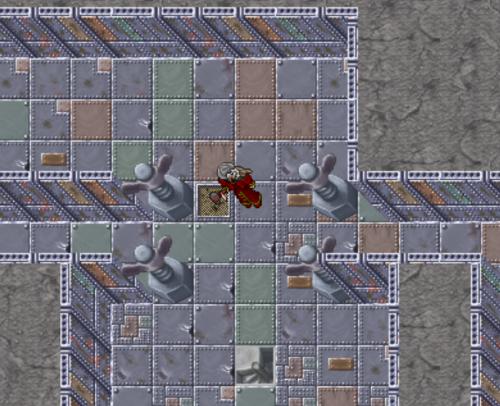
After pulling the three levers all the screws blocking the stairs will be removed.
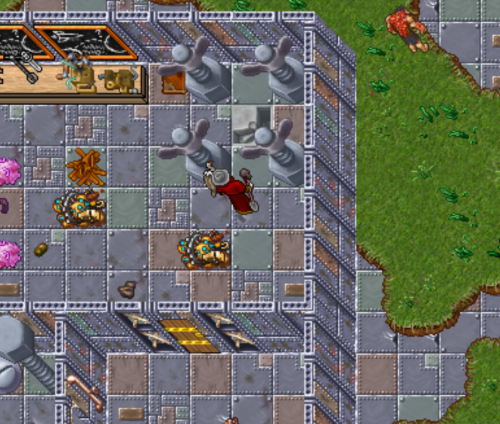
Keep heading down to the east until you find another machine, located here.
Use it three times to break it.
When it breaks six Massive Energy Elementals will spawn.
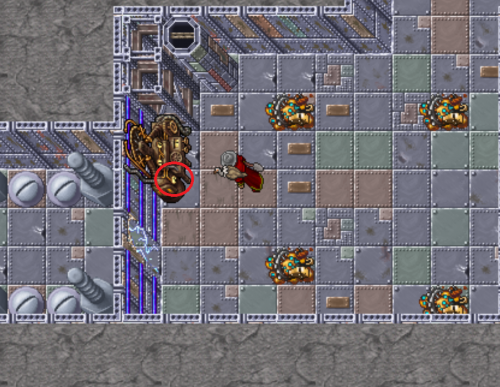
Now head west then south until you reach the lab quarters.
Pick up the Brain on the counter, located here.
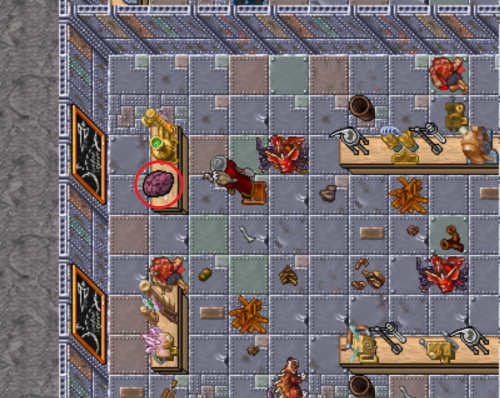
After that you will have access through the quest door to the east, located here.
Here you will find a dead end with locked doors, you will have to turn up the gas in the pipes to cause an explosion.
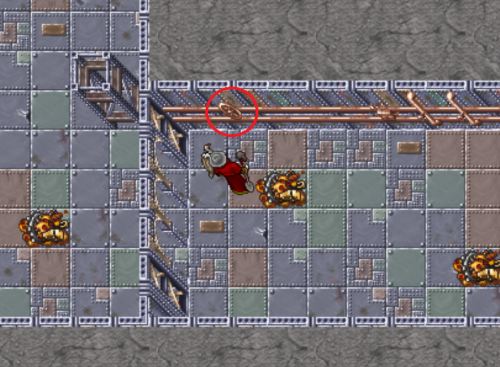
In the big room up ahead you will find another larger machine, hit it three times to break it.
Once it breaks nine Massive Energy Elementals, will spawn.
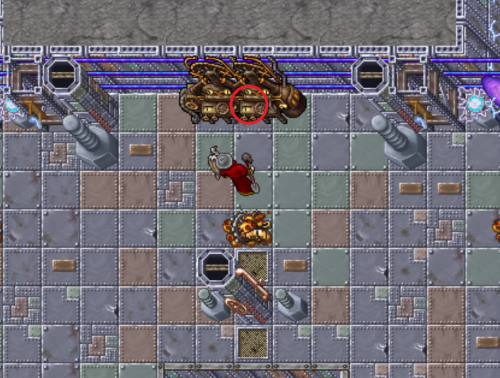
Now the energy blocking the path behind the other side of the wall will be removed, here.
Walk down the stairs and you will find the boss room.
Here is were you need to use the Brain and put it inside the machine for the boss to spawn.
Doing it will spawn the boss Cerebral Mechanix.
When the boss spawns you will be trapped inside the room.
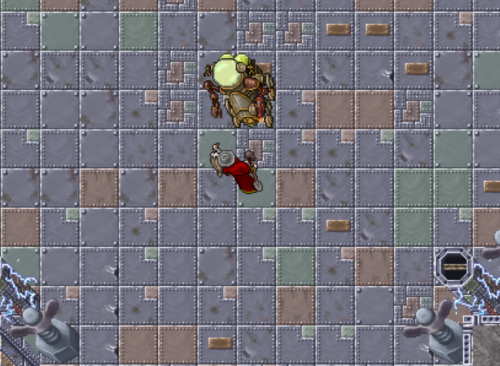
After killing the boss you will have access through this quest door, here.
Inside you will find the Elixir of Vitality.
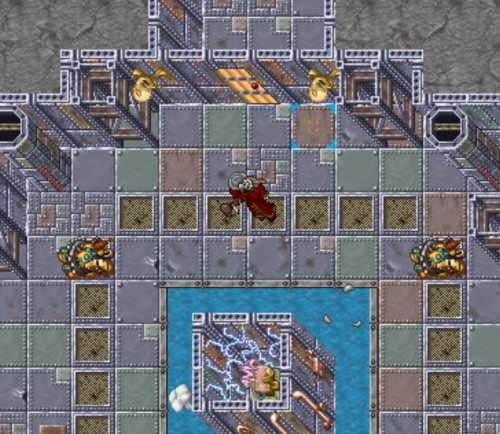
Bring the Elixir of Vitality to Captain Barbossa located, here.
You will need the First Rebirth to access him.
Once you have given him the elixir you will have access to the city of Tavros, just ask him for 'passage' to travel.
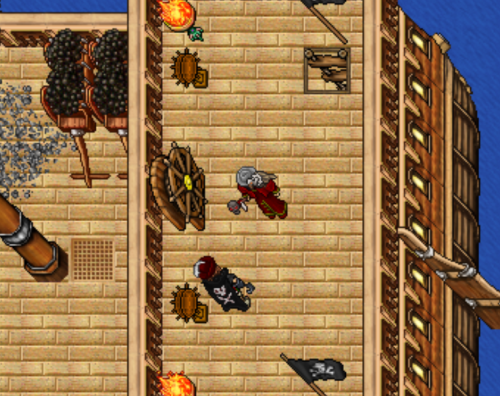
Now head to the north east inside the city and you will find the castle, located here.
Ask Jack the Guard for "passage" or "mission", he will deny your request.
You will have to find a way to make him let you inside.
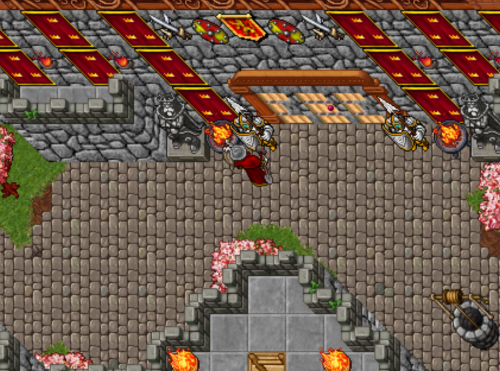
Find the NPC Alda, located here, ask her about "jack" or "mission".
She will ask for some help before telling you anything.
Bring her 10x Pig Foot and 10x Wool.
After that she will tell you find and speak with husband Pavel.
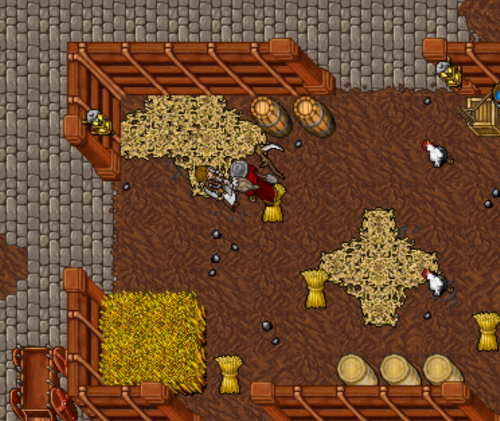
He is located by the docks near the ship to the west, here, ask him about "jack" or "mission".
He will ask for some help before telling you anything.
You will be given a fishing rod, use it on the shimmering spot in the water then speak with him again.
When your done he will tell you to find the beggar Branwulf.
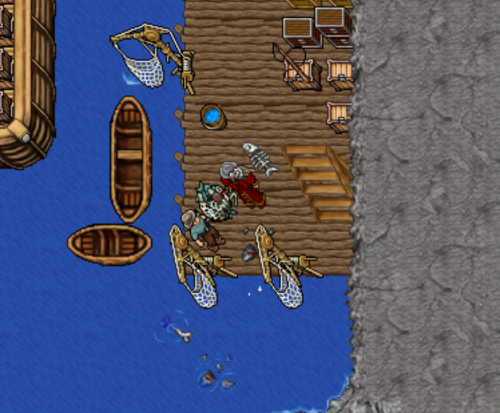
He is located by the temple, here, ask him about "jack" or "mission".
He will ask for some gold before telling you anything.
Bring him 1x Gold Ring.
After that he will tell you he doesn't really know anything but has a place up in the mountains were you might find out something.
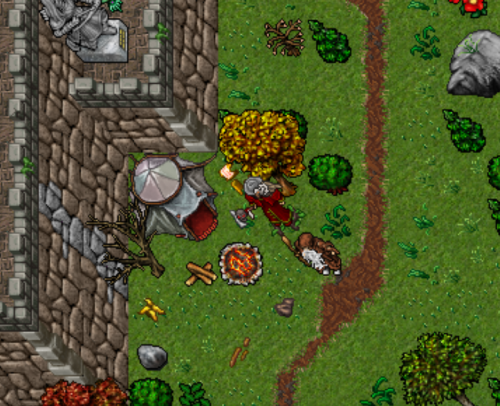
Head out the north gate of the city and walk up the mountain to the east.
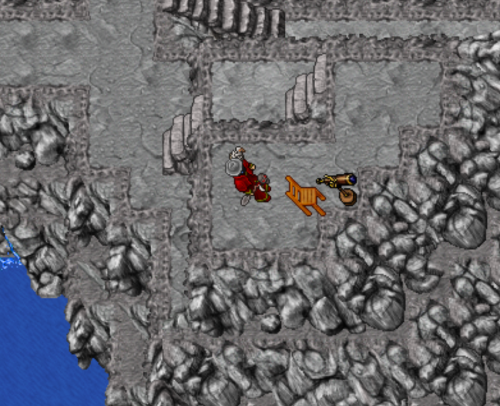
There you will find a telescope, located here.
After using it you see something that you can use to blackmail Jack the Guard to let you inside the castle.
Now go back to Jack the Guard and ask him for "passage" or "mission".
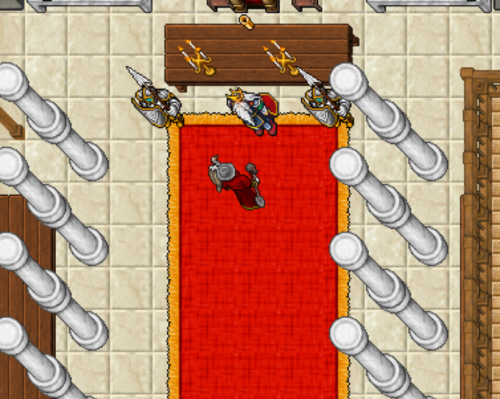
You will now have full access to the castle, where you can find King Tiberius.
Before the King Tiberius will let you promote you will need to prove yourself to him.
You will need to complete four trials outside of the city of Tavros.
They don't need to be done in any specific order.
Undead Grave Cave.
The entrance is located here.
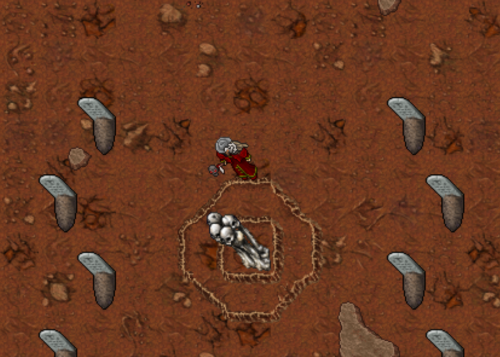
Inside the cave head to the north east you will find a bone totem, located here.
Using it will trap you and spawn eight Gravecallers.
Once you have killed all creatures this trial is done.
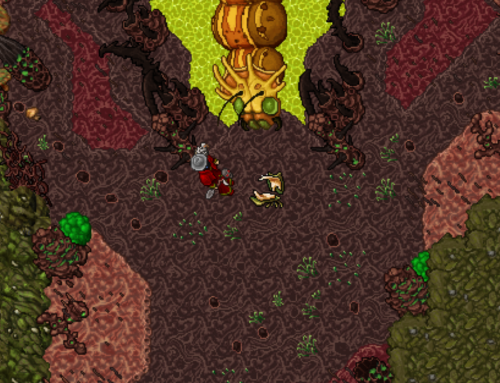
Swamp Cave.
The entrance is located here.
Inside the cave head to the east until you find this spot here, use shovel on it and a hole will appear.
Down there you will find a Giant Larva Bug that each player needs to feed with Bug Meat eight times each.
The Bug Meat can be dropped by Dreadtick, Gloobslug and Duskmoth inside the cave.
Once you have fed the giant larva 8 times the trial is done.
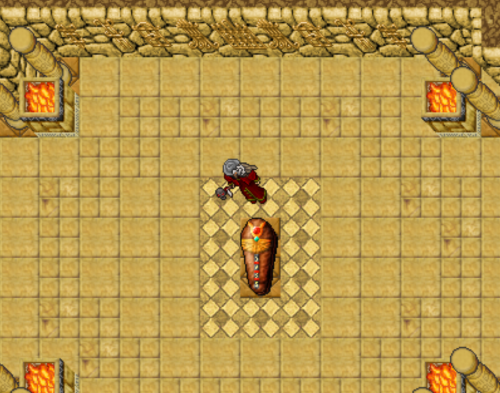
Forgotten Tombs.
The entrance is located here.
Inside the tomb head to big room in the middle on floor -2, here.
Walk down the stairs and enter the room and you will find a coffin, using it will trap you inside and spawn the boss Amun Shai.
Once the boss is killed the trial is done.
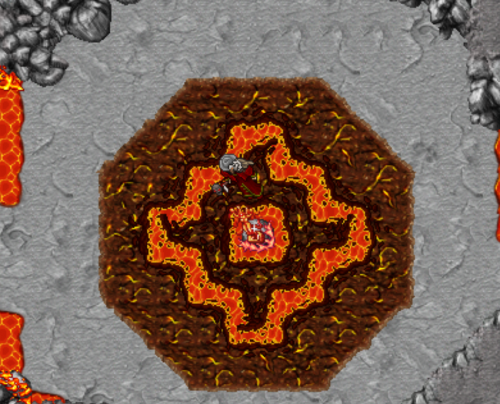
Volcano.
The entrance is located here.
Inside the volcano head north until you find this room with the statue, located here.
Using it will trap you and spawn eight Hellscorchers.
Once you have killed all creatures this trial is done.
Claiming the Reward[edit]
Once you have completed the four trials go back to the King Tiberius and ask for a promotion.
You will need:
- 500x Tavros Token
- 10,000,000 gp
- Level 200 or higher
Strategy Tips[edit]
- Use area spells and runes to maximize damage.
- Coordinate with your team to distribute healing and attacks evenly.
- Be prepared with escape plans in case the battle turns against you.
